
How to Create a PowerSchool Parent Portal Account
The following procedure explains how to create a new parent account in PowerSchool. To create an account, you MUST have the Access ID and Password for at least one student enrolled at the school. Without the Access ID and Password for the student, you will be unable to associate the student with your account. If you do not have the information required or have any questions about the process, please contact your school.
Note: Only applicable is self-registration has been enabled for your school.
Creating Your Account
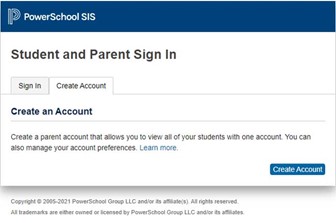
- Open your Web browser to your school’s PowerSchool Student and Parent portal URL. The Student and Parent Sign In page appears.
- Click the Create Account tab. The Create Account page appears.
- Click Create Account. The Create Parent Account page appears.
- Use the following table to enter information in the Create Parent Account section:
| Field | Description |
| First Name | Enter your first name. |
| Last Name | Enter your last name. |
| Enter your email address. The email address you enter is used to send email notifications, including select information, as well as account recovery notices and account changes confirmations. | |
| Re-enter Email | Enter your email address again.
Note: Email addresses must match. |
| Desired Username | Enter the username you would like to use when signing in to the PowerSchool Student and Parent portal. The user name must be unique. If you enter a user name that is already in use, you will be prompted to select or enter another user name. |
| Password | Enter the password you would like to use when signing in to the PowerSchool Student and Parent portal. If your school has established password complexity rules, password requirements will display. Enter your password based upon these requirements. |
| Re-enter Password | Enter your password again exactly as you entered it in the above field. |
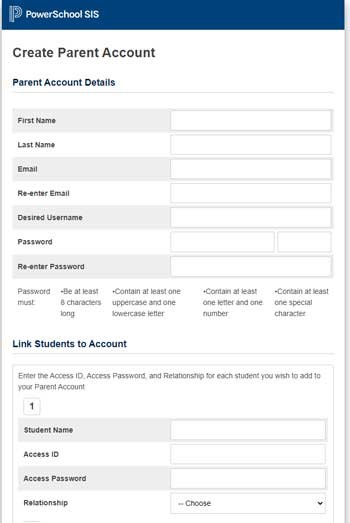
- Use the following table to enter information in Link Students to Account section:
| Field | Description |
| Student Name | Enter the first and last name of the student you want to add to your account. Note: Regardless of the name you enter, the system will populate the name based on the access ID and password for the student. |
| Access ID | Enter the unique access ID for the student. Note: If you do not have this information, contact your school. |
| Access Password | Enter the unique access password for the student. Note: If you do not have this information, contact your school. |
| Relationship | Indicate how you are related to the student by choosing the appropriate association from the pop-up menu. Note: The relationship selected during account creation is for your reference only and is not displayed/used in the PowerSchool admin portal. |
- Click Enter. Your new PowerSchool account has been created and is pending verification.
- Check your email for a PowerSchool Account Email Verification message.
- Click the link within the email to sign in to your PowerSchool account within 24 hours of receiving the message. The Student and Parent Sign In page appears.
Note: If the link has expired, you can request a new link be emailed to you. - Enter your Username and Password.
- Click Sign In. You can now start using your new account.
*Sections of this document taken from PowerSchool documentation: https://docs.powerschool.com/PSHSP/accounts/create-parent-account